


Fiber splicing is occasionally encountered when using optical fiber. Due to the fragility of optical fiber itself, it requires extreme caution during installation. This article will focus on the steps of fiber splicing. Through detailed analysis, it can be used as a reference for fiber splicing. It also includes fiber testing, which helps to more clearly understand the fiber loss.
1. Key points to note for fiber splicing
(1) The principle to be followed in fiber splicing is: when the number of cores is equal, the corresponding color optical fibers in the bundle tube should be connected. When the number of cores is different, the larger core number should be connected first, and then the smaller core number.
(2) There are three methods for fiber splicing: fusion splicing, active connection, and mechanical connection. Fusion splicing is mostly used in work. The splicing method has low joint loss, high reflection loss, and high reliability.
2. Steps of fiber splicing
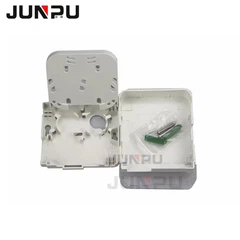
(1) Strip the optical cable and fix the optical cable to the splicing box. Be careful not to damage the bundle tube. The stripping length is about 1m. Wipe the grease clean with toilet paper. Pass the optical cable into the junction box. When fixing the steel wire, be sure to press it tightly and not let it loose. Otherwise, the optical cable may roll and break the fiber core.
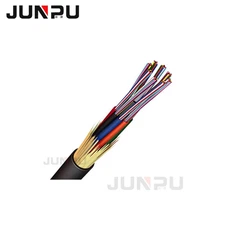
(2) Splitting the fiber and pass the optical fiber through the heat shrink tube. Separate the optical fibers of different bundle tubes and different colors and pass them through the heat shrink tube. The optical fiber stripped of the coating is very fragile. Using a heat shrink tube can protect the optical fiber fusion joint.
(3) Turn on the power of the fusion splicer and use the preset program for fusion splicing. During and after use, remove the dust in the fusion splicer in time, especially the dust and fiber fragments in the fixture, mirrors and V-grooves. The optical fibers used are conventional single-mode optical fibers and dispersion-shifted single-mode optical fibers, and the operating wavelengths are also 1310nm and 1550nm. Therefore, before fusion splicing, select the appropriate fusion splicing program according to the optical fiber used in the system and the operating wavelength. If there are no special circumstances, the automatic fusion splicing program is generally used.
(4) Make the optical fiber end face. The quality of the fiber end face will directly affect the quality of the connection, so a qualified end face must be made before fusion. Use a special wire stripper to strip the coating layer, and then wipe the bare fiber several times with a cotton pad soaked in alcohol. Use moderate force, and then use a precision fiber cleaver to cut the fiber. For 0.25mm (outer coating) fiber, the cutting length is 8mm-16mm, and for 0.9mm (outer coating) fiber, the cutting length can only be 16mm.
(5) Place the fiber. Place the fiber in the V-groove of the fusion splicer, carefully press the fiber pressure plate and fiber clamp, set the position of the fiber in the pressure plate according to the fiber cutting length, close the wind shield, and the fusion splicing can be completed automatically.
(6) Remove the fiber and heat the heat shrink tube with a heating furnace. Open the wind shield, take the fiber out of the fusion splicer, and then place the heat shrink tube in the center of the bare fiber and put it in the heating furnace to heat. The heater can use 20mm micro heat shrink tubing and 40mm and 60mm general heat shrink tubing. 20mm heat shrink tubing takes 40 seconds, and 60mm heat shrink tubing takes 85 seconds.
(7) Fiber coiling and fixing. Coil the spliced optical fiber onto the optical fiber receiving tray. When coiling the fiber, the larger the radius of the coil and the larger the arc, the smaller the loss of the entire line. Therefore, a certain radius must be maintained to avoid unnecessary loss when the laser is transmitted in the fiber core.
(8) Sealing and hanging. The field splicing box must be sealed well to prevent water ingress. After the splicing box is flooded, the optical fiber and the optical fiber splicing point are immersed in water for a long time, and the attenuation of some optical fibers may increase first. Put on the stainless steel hook and hang it on the hanging wire. At this point, the optical fiber splicing is completed.
2. The importance of optical fiber testing
After the optical fiber is installed and the splicing is completed, the test work is carried out. The instrument used is mainly the OTDR tester, which can test the location of the optical fiber breakpoint; the entire loss of the optical fiber link; understand the loss distribution along the length of the optical fiber; and the joint loss of the optical fiber splicing point.
In order to test accurately, the pulse size and width of the OTDR tester should be appropriately selected and set according to the refractive index n value given by the manufacturer. When judging the fault point, if the length of the optical cable is not known in advance, you can first put it on the automatic OTDR to find the approximate location of the fault point, and then put it on the advanced OTDR. Choose a smaller pulse size and width, but it should correspond to the length of the optical cable. The blind area is reduced until it coincides with the coordinate line. The smaller the pulse width, the more accurate it is. Of course, if the pulse is too small, the curve display will show noise. It should be just right. Then add a fiber probe disk to prevent blind areas from being difficult to detect nearby.
When judging the breakpoint, if the breakpoint is not at the junction box, open the nearby junction box, connect the OTDR tester, test the exact distance between the fault point and the test point, and use the meter mark on the optical cable to easily find the fault point. When using a meter mark to find faults, there is also a twisting rate problem for stranded optical cables, that is, the length of the optical cable is not equal to the length of the optical fiber.
The length of the optical fiber is approximately 1.005 times the length of the optical cable. The above method can be used to successfully eliminate multiple breakpoints and high-loss points.